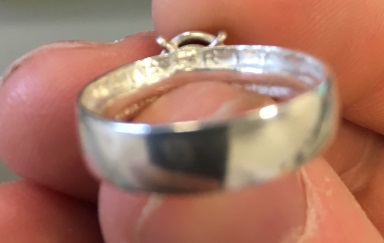
So I started out by finding an article online on how to make a ring out of a quarter. Then, after I finished, it didn't look girly enough, so I decided to add a setting to it. I found another article on how to do that. Neither of these are things I've ever done before, I'm not a metallurgist or anything else like that.
The quarter was from her birth year, so that's embedded on the inside of the band. The stone is her birthstone (or, well, a copy thereof).
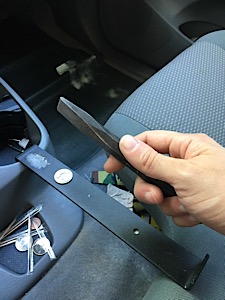
I did most of the work in my truck, while on break at work. I didn't want her figuring out what I was doing at home. Nearly the entire process of making the ring and much of the filing/cutting/etc for the setting was done in my truck. I set up a metal bar as a little mini-workbench, that fit across the seat and drink holders, to make it easier. Two ten minute breaks per day, plus some days the entire lunch break.
Not done in truck - anything involving electricity or fire. Needless to say I got quite a few onlookers over the past two months.
Quote from co-worker: "If the truck is a-rockin, Vlad must be working on that ring again"In total, I went through two other rings and two other settings before I got it right.
Here’s how to make the ring itself.Good guide. NOTE, the first picture and the picture for #13 are deceptive… he used an image from someone else’s project. Kind of a jerk move. Your ring won’t look this way unless you do some further processing not included in the guide. (e.g. those little dots around the inner edge appear to have been stamped on, etc…)
Here’s how to make the setting.This was a fantastic guide, and made it easy for a newbie like me to make a great looking setting.
Tools and supplies used to make just the ring portion:• A real silver quarter, with my wife’s birth year on it. 10 bucks on Ebay.
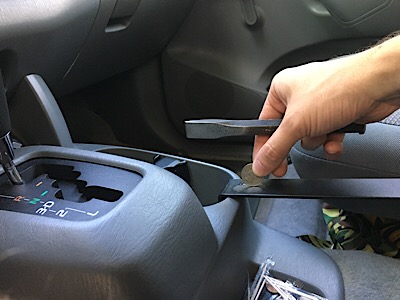
• Medium-weight tool with a flat edge (I used a big flat chisel) and a hard surface on which to tap the quarter. Don’t use a big ol claw hammer, it’ll distort the coin. Don’t use a spoon, that’ll take you
the rest of your natural life.
• Various and sundry metal drill bits. Already had them.
• Grinding Dremel tip. I don’t have a Dremel tool, but it fit in the drill. Couple bucks.
• Polishing cloth wheel Dremel tip. Couple bucks.
• Silver polish, from Walmart. Couple bucks.
• Sandpaper. 120 grit all the way up to 2000 grit. (120, 200, 600, 1200, 2000 I think were the ones I used). The 2000 makes a nice difference in the end, in terms of shine.
• 6-piece needle file set from Walmart. Was like, three bucks. Variety of shapes. Ended up using the flat, half-round, triangle, and round.
• Lots of junk rags, to protect the ring any time I had to put it in pliers or a vise
• Regular old pliers
• A vise
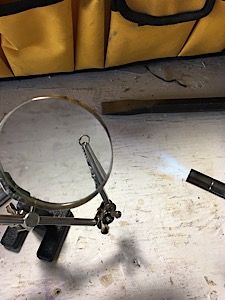
Additional stuff, for the setting:• Third hand. Ten bucks online. Didn’t really need the magnifying glass, just used it as a holder while soldering.
• Bernzomatic cheapo blowtorch from Walmart. Maybe 20 bucks?
• Needlenose pliers
• Wire cutters
• Plastic cup and plastic fork for cold pickling, quenching with water, etc…
• A really small syringe of easy silver solder/flux paste. 15 bucks?
• A really small syringe of hard silver solder/flux paste. 20 bucks?
• 3ft of sterling silver wire, 20 gauge.
• 1 nice looking 6mm red cubic zirconia. Couple bucks on ebay. If I had been willing to wait 6 weeks, ebay had whole bags of CZ’s from overseas, for the same price.
Lessons learned:• Soldering silver is
absolutely nothing like using good ol' resin-core electronics solder.
Great instructional video here.• Always solder in a well-ventilated area.
Metal Fume Fever is a real thing, not just a cool band name.
• When soldering, keep the torch moving constantly. Heat the piece first and only heat the solder at the very end.
• Never solder over any other solder without pickling first. It won’t stick unless the area is clean and free of oxide, grease, etc…
•
Cold pickle is OK to clean solder joints. 1c vinegar to 1tsp salt, mix well, leave piece for 30 minutes then rinse with water and dry. ONLY USE plastic utensils when working with this.
• Hot pickle is what you need when you mass clean the whole finished piece. Heat the aforementioned vinegar solution in a pot on the stove to a simmer, drop the piece in for a minute or two, then remove and rinse well with soap and water.
• After soldering, the piece may turn black. This is due to oxides bubbling to the surface. Hot pickle, and then polish using silver polish and cloth.
• After soldering, the piece may turn pale white. This is due to
annealing (silver particles lining up and softening the piece). Polish using silver polish and cloth.
• Let solder cool for 10 minutes before touching the piece, at all. Walk away. Silver solder is apparently really fragile until cool. I don’t know if quenching it in a cup of water helped, but it didn’t hurt.
• If your silver starts turning red, you’ve heated it a little too far. Stop immediately, give it a break for a few seconds, and then pick it back up.
If the silver (not the solder) starts on fire and melts into a puddle, you’ve heated it a lot too far.• If you’re soldering wire, it doesn’t matter the hardness of the wire. Hard, half-hard, soft, etc… will all be annealed during the heating process and end up as soft.
• Save a little bit of silver wire (~1/2”) to use as a tool pre- and post-soldering. Helps align stuff, scrape off leftover solder/flux while it’s still hot, etc…
• Their little wacky “file notches in a nail” solution in the second article just didn’t work well for me. Smooshing the stuff together with the bottom of a hammer handle against a concrete floor worked better.
• Drilling and whatnot was best done on an unpainted section of wood. Drilling (and thus heating) the ring on a painted workbench ruined my first ring attempt beyond my repair skills (but that was the crummy zinc/copper one anyway)
And finally, here's the pics. One thing I'm
definitely not is a photographer, so excuse the quality.
My "workbench" setup for doing covert work in the truck.
Holding the coin. Tap tap tap with the flat side of chisel. Repeat A LOT.
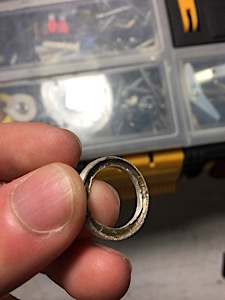
Attempt #2, sanded and ground too far into the margins. This ring came out uneven and thin. The discoloration would come off via pickling. I may even it out, file off that inner lip, and use it for a future piece.
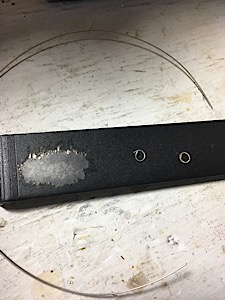
Some jump rings for the setting, and a length of wire they were made from.
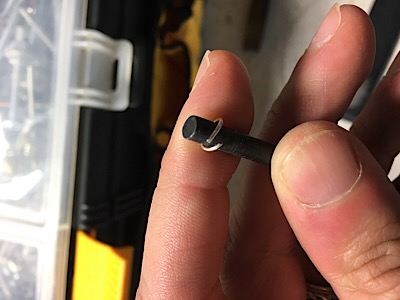
Finishing a jump ring, using drill bit as a template. (I wound the wire around the bit three or four times to make a bunch of jump rings, then snipped)
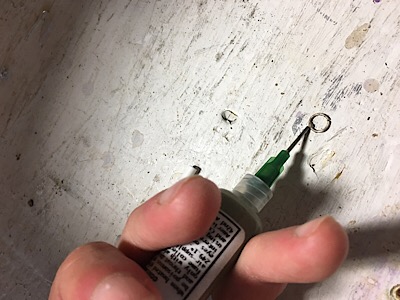
Adding hard silver solder to jump ring.
Heating the solder.
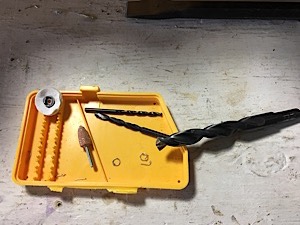
Drill bits (two sizes for two jump ring sizes, plus the big one for drilling out the center), grinding tip, polishing wheel.
Finished product...

And here's the inside of the band, to show you that it was once a quarter. It looks better IRL, but the phone camera makes it look kinda funky.
